
In this post, I will be showing you how to change a simple recessed downlight light bulb in your home.
A lot of people get finds it difficult and some times ignore a downlight unit that might have gone bad for some time.
Usually, this is because if you take a look at most installed recessed downlight, you will see that there is no clear way of gaining access to the light bulbs. In some cases, The bulbs are buried deep inside that you may not be totally sure of its exact shape or size.
How to Change a Recessed Downlight Bulb
This article and the image guide is meant to show you how easy you can do this yourself
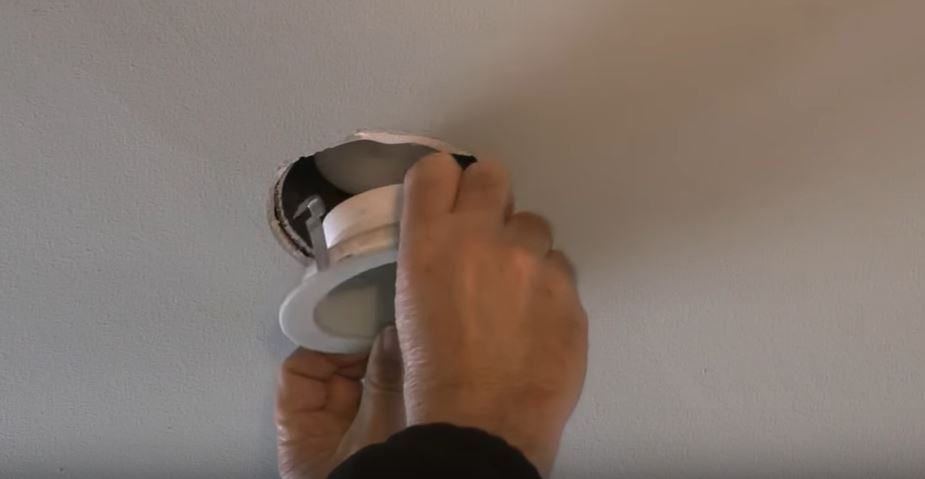
Step 1: Remove Trim Cover
Most recessed lights have a trim cover that you have to remove. To do this, all you have to do is to place your finger on the side of the lights and gently wriggle out the light down.

Step 2: Find Key Pins
As you pull the light down you will observe the key pin on both sides of the light. You have to hold them down so that the light can freely exit the can it is placed in.
Step 3: Unscrew the Downlight Bulb
Some downlights have an inner plug that is attached to the outside unit, but the type in the image is different and only requires you to put your hand into the recessed opening and screw out the bulb in an anti-clockwise direction.

Step 4: Replace Bulb
Now that you have the old bulb removed, have your new pack of a bulb, place and thread it back, this time in a clockwise direction


 Step 5: Check Power
After installing your new bulb, power on the light to ensure that your bulb is working.

Once your light bulb is changed and everything is working properly, The next thing to do is to take the downlight cover and fit it back into the opening while guiding the clipping pins to fit into place properly.